DisCal - Setup
The following page is a step by step instruction for how to properly
setup DisCal.
It's quite simple, but you must create a new calendar in order for
DisCal to function fully.
1. Add DisCal to your Discord server
Skip this step if you have just added DisCal to your
server.
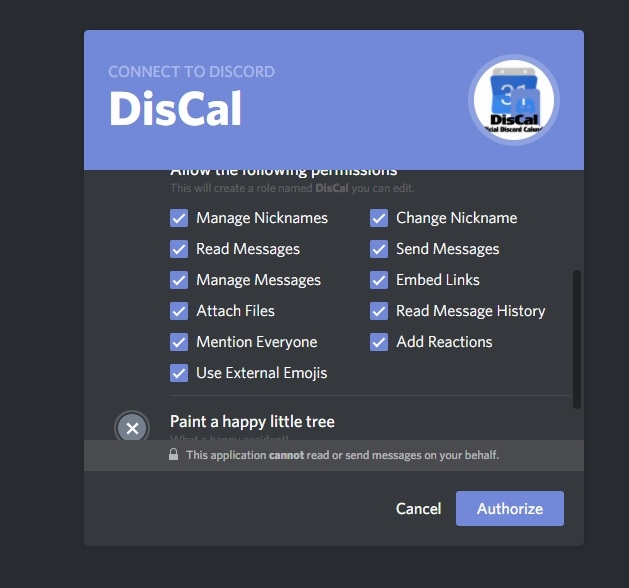
Click the button below to authorize DisCal and select the server you want it
on.
You must have the "Manage Server" permission to add the bot. Contact the
server owner or admin to invite DisCal if you cannot.

2. Give DisCal permissions at server level and not at channel level (channel permissions don't always work right)
If you have a Bot permission group, assign DisCal that permission.
If not, create a new permission role with the following permissions so that
DisCal may read and send messages based on its commands:
- Read Messages*
- Send Messages
- Embed Links
- Mention Everyone
- Manager Messages
- Reactions/External Emojis
* DisCal will not log or save any messages.
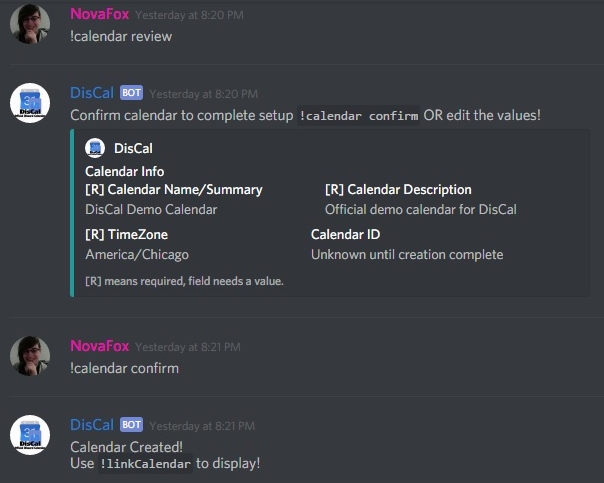
3. Create a Calendar for your Discord
DisCal currently only allows 1 calendar per server.
Use the command "!calendar create [calendar name]" in any channel.
(You can create a special channel just for DisCal commands if you want.)
Once that command is issued, DisCal will handle the rest and walk you
through a step by step guide into creating your new calendar!
Optionally you may attach an external calendar. (This feature is currently
in open testing for Patreon supporters.
Visit our Discord server for more information.)
For all information on existing commands as well as some tutorial .gifs,
click the button below.